Ceci est une ancienne révision du document !
CAISSETACT Touchscreen till (configuration) *
 A1 proofreading not yet completed for this page. In the meantime, please feel free to ask any questions on the forum.
Please note: if you are in Europe, please read this page.
Configuration
Access: Tools → Application settings → Extension settings → Touchscreen checkout
General Tab
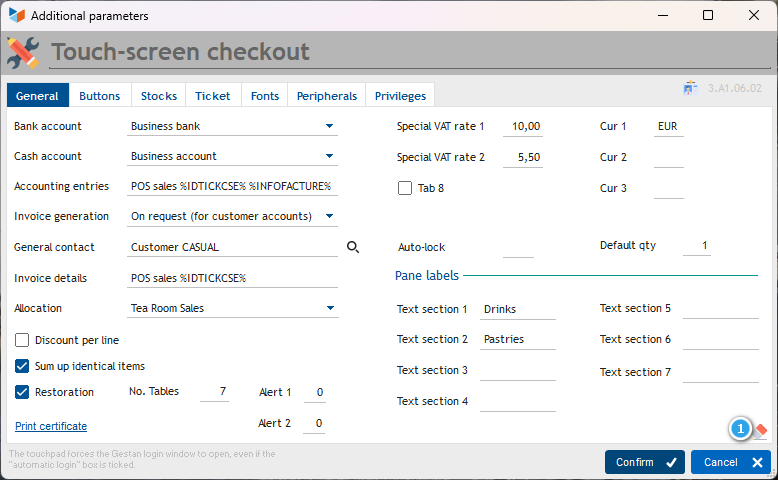
Enter the account code, the bank account, and the cash account that will be used by default for automatically generated journal entries.
You can specify a default entry description for accounting entries, for example ‘Cash sales’. If you generate invoices for each sale, you can use the keywords %IDTICKCSE% and %INFOFACTURE%, which will allow you to quickly reconcile the entries with the invoices.
The Invoice Generation drop-down menu allows you to:
- never to record an invoice. In this case, only a till receipt will be created, with the corresponding accounting entry;
- to create invoices only on request for customer accounts. In this case, in addition to the receipt and the entry, an invoice can be generated if you link the receipt to a customer account;
- to automatically generate an invoice for receipts linked to a customer account. In this case, in addition to the receipt and the journal entry, an invoice will be generated for any receipt you link to a customer account;
- to automatically generate an invoice for every receipt recorded.
The generic contact is the contact to which all invoices generated for which no specific contact has been specified will be linked by default. You can create a contact for this purpose, for example Mr VENTECAISSE.
The invoice description will be the default description used in the invoice type (if generated).
Ticking the Discount per line box will display a ‘discount’ column on the touchscreen till
For the Totalise identical items box, let’s take an example: if your customer buys 4 bottles of the same wine, if the box is not ticked, you will have 4 lines on your receipt, whereas if it is ticked, you will have just one line, with a quantity of 4.
Tick the Catering box if your business is a bar, restaurant, or any establishment with customer tables. If this box is ticked, you can enter the number of tables in the No. of tables field. You can specify the number of minutes after which it would be advisable to serve the table (Alert 1), and the number of minutes after which it is essential to serve the table (Alert 2). If these time limits are exceeded, the tables in question will be marked with specific icons on the table list.
Translated with DeepL.com (free version)
The Special VAT Rates 1 and 2 fields allow you to save special VAT rates that you can then easily apply to all or part of the receipt, where applicable. For example, you run a tea room. You mostly sell treats to be eaten in-house (VAT at 5.5%), but also some takeaway groceries (VAT at 10%) and alcoholic drinks (VAT at 20%). In Gestan, set a default rate of 5.5%. Then declare the 10% and 20% rates as special rates. By default, your receipts will be issued with VAT at 5.5%, except for the lines you specify, to which you can apply a special rate of 10% or 20%.
The Currency 1, 2 and 3 fields allow you to save the currencies available for multi-currency payments.
The ‘Panel’ labels allow you to display between 1 and 7 panels, each of which can display between 1 and 12 customisable buttons: simply tap the button to record the sale of the corresponding product. These panels can be configured per user; the button on the left-hand side of the first panel allows you to apply the same settings to all users.
The 1 button allows you to clear the settings for all users – please be careful!
The Print certificate button allows you to print the NF525 compliance certificate.
Buttons Panel
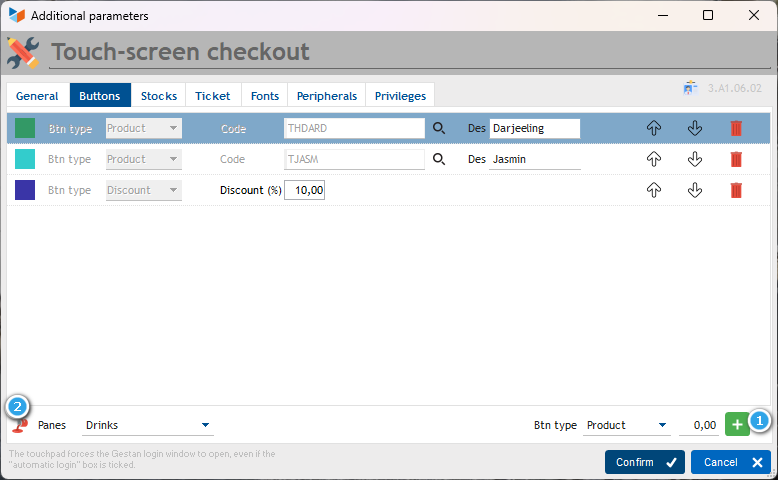
This tab allows you to configure the products or discounts to be displayed on the panels of the checkout interface.
Up to 12 buttons can be displayed per panel.
These settings can be defined on a per-user basis; the red 1 button allows you to apply the same settings to all users.
Stock Module
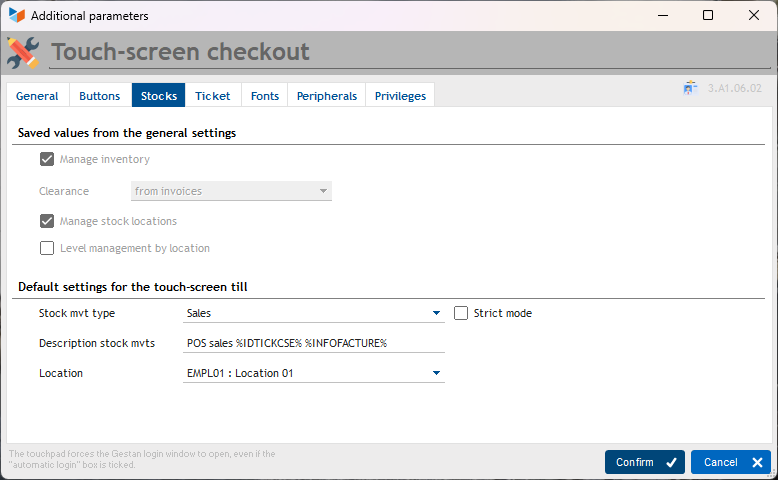
The top section displays the settings saved in Gestan (as a reminder). The bottom section shows the touchscreen till settings, which are based on these.
You must specify a stock movement type to be generated. If the Strict mode box is ticked, the sale of a product with zero stock will be refused (otherwise, the stock will become negative).
In the stock movement label, you can enter ‘Cash register sale’, for example. However, if you generate invoices, you can also use the keywords %IDTICKCSE% and %INFOFACTURE%, which will make it easier to identify stock movements.
The Location drop-down menu is displayed if you manage stock locations, allowing you to select the default location for movements.
Receipt Tab
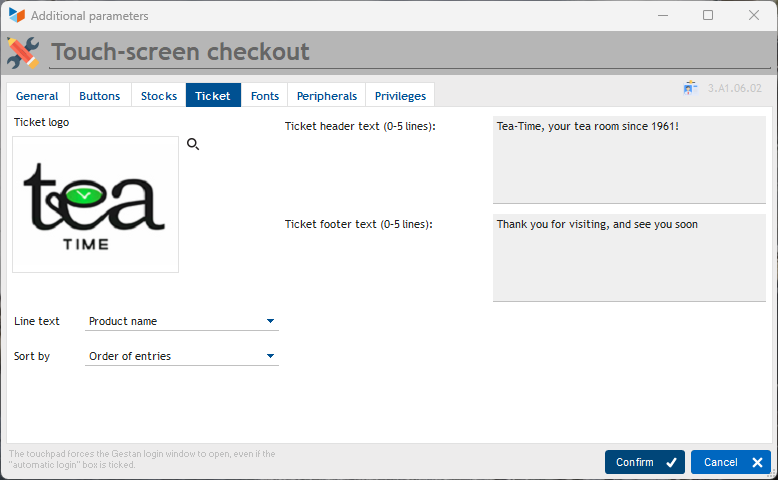
This tab allows you to configure the receipt layout.
Firstly, the company logo.
The Line Description drop-down menu allows you to choose what will be written on the receipt lines: product code and/or its description, as well as other options. Using Sort by, you can sort the lines either by order of entry, by product code or description, or by EAN13 codes.
And you can print any commercial information you wish at the top and/or bottom of receipts (Top label and Bottom label) (you can use Gestan keywords).
Fonts Tab
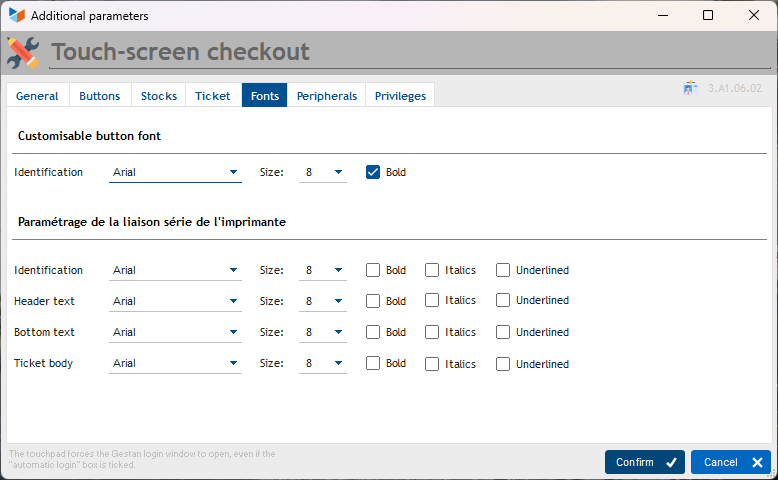
This tab allows you to configure the fonts for the touchscreen checkout buttons and those used on the receipt.
User Settings
These settings must be configured for each user.
How it works
The Start-up mode allows you to:
- not start the till, for example to temporarily disable it for a particular user
- start the till only on request. In this case, you will launch the till via the menu Business → Touchscreen till.
- to start the till automatically. In this case, Gestan opens the till immediately upon launching Gestan.
 For the ‘Automatic start’ option, your password must consist solely of numbers. This is because the till login screen, due to the touchscreen mode, is simplified and only accepts passwords consisting entirely of numbers.
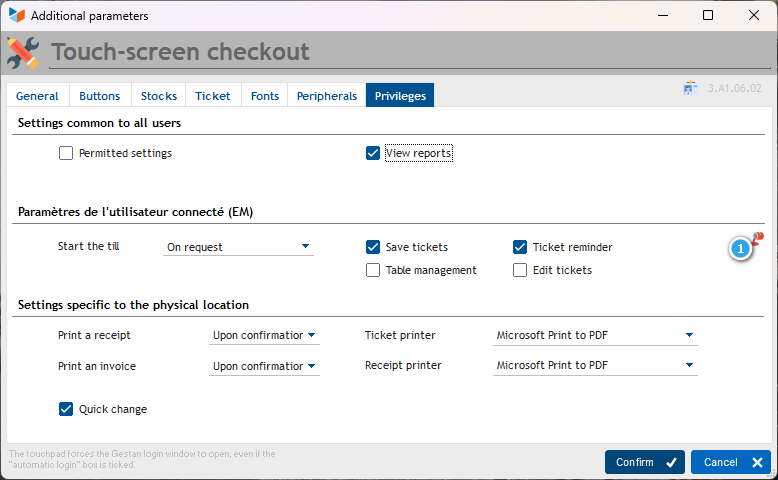
If the Configuration permitted box is unchecked, the user will not have access to configuration via the till interface (but will still have access, if they are an administrator, via the Gestan interface).
The Quick Change box allows you to switch users without going through the end-of-shift procedure (i.e. closing the shift and counting the till).
Printing receipts
You can set Gestan to never print a receipt, to print it upon confirmation, or to always print it; You can also select the receipt printer to which the print job should be sent.
Printing invoices
Similarly, if you generate invoices, you can instruct Gestan never to print them, to print them upon confirmation, or to always print them; you can also select the A4 printer to which the print job should be sent.
Display and Cash Drawer Section
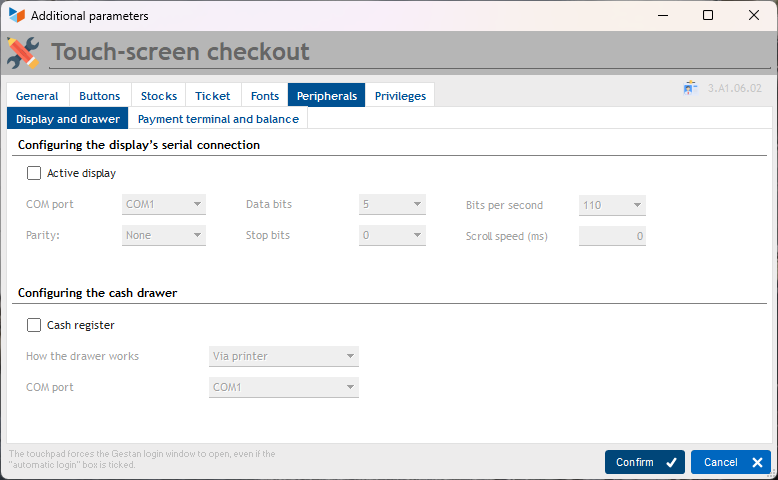
Display
You can connect a display to your PC, which shows the prices of items and the total amount due at the end.
For the display, if you have ticked the ‘display active’ box, you can specify the settings required for it to work properly. Please refer to the supplier’s manual.
Cash Drawer
Cash drawers can operate either via a printer port or via a special adapter. In the latter case, you must specify the COM port used.
POS Terminal and Scale
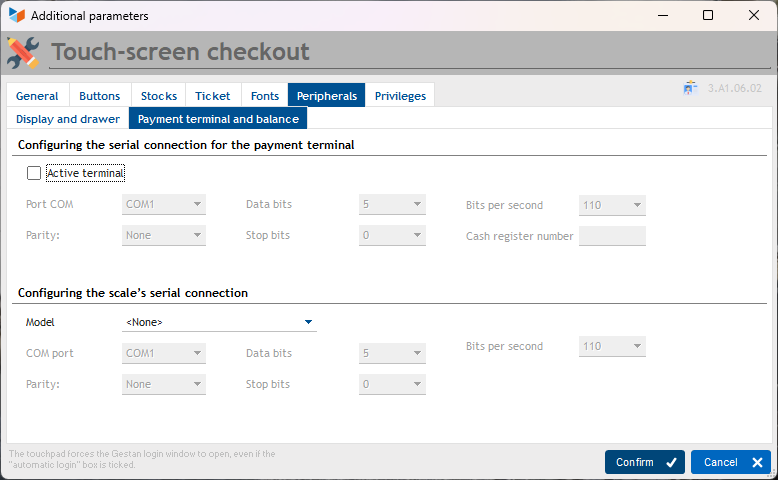
Payment Terminal
There are two ways to use a POS terminal:
- Standalone use (the ‘POS’ box is not ticked): your POS terminal is not connected to your PC; it operates independently. You manually enter the amount to be debited, wait for authorisation from the bank, print the customer and accounting receipts, then click the ‘Card’ button when saving the payment
- connected use (the ‘POS terminal’ box is ticked): your POS terminal is connected to your PC. When you click the ‘Card’ button, the amount to be debited is sent to the POS terminal, and once authorisation is granted, the transaction is recorded in Gestan.
The till number must be entered: this two-digit code identifies the till.
For connected use, you must specify the configuration settings; please refer to the POS terminal supplier’s manual.
Scales
It is possible to connect a set of scales to your PC and retrieve the weight measured by the scales directly.
In this case, you must also specify the configuration settings; please refer to the supplier’s manual.
Peripherals
You can connect the following to the touchscreen till:
- a payment terminal
- a cash drawer (connected via a USB-to-serial adapter)
- a receipt printer
- a display (connected via a USB-to-serial adapter)
- a scale. You can connect it to a serial port (DB9) or via a USB/serial adapter to connect it to a USB port.
Of course, you will need to install the necessary drivers, which are usually provided on a CD-ROM supplied with the equipment.
Although this is not intended as a specific recommendation on our part, here is the equipment we use:
- Cash drawer: model EC410.
- Cash drawer adapter: USB cash drawer adapter
- Display: DIGIPOS WD-202E (VFD-23R)
- Receipt printer: EPSON model TM-T20II
- POS terminal: INGENICO model iWL250 Bluetooth, contactless
- Scale 2: ADAM model AZExtra 3 (3000 g x 1 g)
When it comes to scales, every manufacturer seems to enjoy coming up with different protocols. And sometimes, communication protocols even differ between models of the same brand  If you choose to use a scale other than these two models, we will likely need to develop a specific interface for you (this isn’t a problem; simply send us the equipment, and expect a development cost of 180 euros).
 Other ‘Extensions’ articles
CERFA : Generating CERFAs
COMMISSIONSCO: Sales commissions
CYBERBANQUE: Integration of banking files
DRM: Monthly Summary Declaration
ETIQUEXPED: Shipping labels
INTEROR: repair orders (RO)
OBJVENTE: Sales targets
PREPBON: Picking slips
RELAUTO: Automatic mass invoice reminders
SAVTICKET: After-sales service tickets
SCAN: Scanning a barcode
SUIVCOM: Order Tracking